What did you do to your RHO Today?

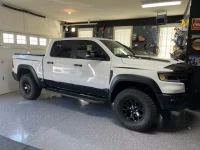
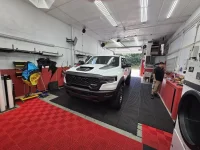
New member, got my truck in May and picked it up on a rainy day, couldn’t believe how much crap kicked up in the bed sides of the truck. Had my local shop install ppf on the bed and tailgate and ordered rokblokz mud flaps. Love the look of the mudflats and the ppf washes the dirt off easily, wish I wrapped the entire truck
 
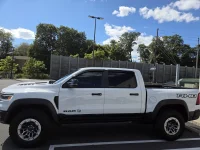
New shoes
Volk Racing TE37XT Mspec 18x9 +0
Toyo Open Country RT Trail 37x12.50r18
IMG_1325.webp
IMG_1325.webp
IMG_1319.webp
IMG_1325.webp
IMG_1319.webp
IMG_1328.webp
IMG_1333.webp
 
New here as well, been lurking for a while. I got my level 1 RHO used with 600 miles on it so it was discounted. Came with Ram running boards and the cargo package . It was everything I was going to order new so it was a win win. Had it ceramic coated , installed the Tyger sport bar, pedal commander to rid that lag, and this weekend the MRT extreme mid pipe are getting installed . Nice to meet y’all!!
IMG_4065.webp
IMG_4067.webp
IMG_4064.webp
IMG_4051.webp
 
I really appreciate that info. I definitely want to do the hood decal. Not yet sure on the RHO on the sides. I think I’m about a week out from receiving my truck, so should make a decision on that soon after.

I had been looking at Rumble Wraps as I think I like the terrain decals, but they’re definitely a lot more expensive than what you went with from Anchor… so I’ll consider that.

What did you end up doing for window tint? I’m considering going darker on this truck.
Those look really sick. Did you get them yet? Realizing this was a while ago. Wondering if we could get enough people together to get a group buy.
 
Introduced it to a Jailbreak!
IMG_4676.webp
 
was fooling around with tape stripes today. Not permanent of course?
I think they look out of place imo…love the effort to try something different!!

It kinda reminds me of the 90’s when they used a lot of striping on trucks or did the “fade” of one color and would then change on the lower halves of trucks…

Chris
 
Installed an M&R 23" PRO light bar from @MandRautomotive and an "RHO" front grille badge from Exotic Innovations @BigRay

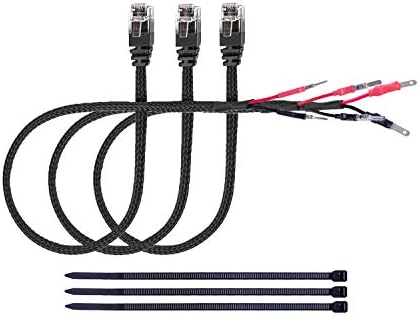
The quality of the light bar is excellent. All parts were included, even the wire crimp connectors. Hooks up seamlessly to the factory auxiliary switches in the cab for an OEM-like fit. The YouTube video installation instructions were super easy to follow, and it took me about 3.5 hours, which included a lunch break.

The grille badge is OEM quality with color matched paint and pre-applied 3M tape (came with 3M adhesion promoter too). It's a bit hard to see in th
e shadows with the lights on, but I've got more badges to apply later and will take some additional pictures when I get those on.

Very happy with both purchases!

Thank you M&R and Exotic Innovations!


RAM Lights 2.webp
RAM Lights 1.webp
RAM Lights 3.webp
 
Last edited:
Installed an M&R 23" PRO light bar from @MandRautomotive and an "RHO" front grille badge from Exotic Innovations @BigRay

The quality of the light bar is excellent. All parts were included, even the wire crimp connectors. Hooks up seamlessly to the factory auxiliary switches in the cab for an OEM-like fit. The YouTube video installation instructions were super easy to follow, and it took me about 3.5 hours, which included a lunch break.

The grille badge is OEM quality with color matched paint and pre-applied 3M tape (came with 3M adhesion promoter too). It's a bit hard to see in th
e shadows with the lights on, but I've got more badges to apply later and will take some additional pictures when I get those on.

Very happy with both purchases!

Thank you M&R and Exotic Innovations!


View attachment 17703View attachment 17704View attachment 17705
Pretty sure Im going with this lightbar as well... Looks awesome!!!
 
Installed an M&R 23" PRO light bar from @MandRautomotive and an "RHO" front grille badge from Exotic Innovations @BigRay

The quality of the light bar is excellent. All parts were included, even the wire crimp connectors. Hooks up seamlessly to the factory auxiliary switches in the cab for an OEM-like fit. The YouTube video installation instructions were super easy to follow, and it took me about 3.5 hours, which included a lunch break.

The grille badge is OEM quality with color matched paint and pre-applied 3M tape (came with 3M adhesion promoter too). It's a bit hard to see in th
e shadows with the lights on, but I've got more badges to apply later and will take some additional pictures when I get those on.

Very happy with both purchases!

Thank you M&R and Exotic Innovations!


View attachment 17703View attachment 17704View attachment 17705
Any concerns at all about breaking clips or having other problems with the light bar install? I'm considering it, but I am a complete novice with this kind of project.
 
Any concerns at all about breaking clips or having other problems with the light bar install? I'm considering it, but I am a complete novice with this kind of project.
I’m not a mechanic, but I’m “YouTube Certified” on simple repairs. On a scale of 1-10 with “1” being changing a tire and “10” being something I would take to the dealer I’d rank it a “5”.

The first clip in the video took some pushing and it made a disconcerting snap when released but no problem, the clips are very durable and made of pliable plastic (same as the body panel), not hard/brittle.

I used painters tape liberally on all the bumper, grill, and body panel edges, just in case.

Push DOWN on the clips. I made the mistake of pushing the last clip backwards through until it was stuck pointing up and impossible to pull off. So, it took me some time to situate the grill in a way that allowed me to get behind the clip, push it down, and release the grill from the body panel. Sounds worse than it was, but suffice to say the clip went through some twisting and flexing and did not break. Push DOWN on the clips!

A set of inexpensive plastic body tools with a push pin puller is very helpful. Also, you’ll want to use deep sockets and an extension to get the three 10mm bolts on the lower corners of the grill. A handheld impact driver is a nice to have (I used a relatively inexpensive Ryobi that works with my batteries).

The most difficult part was pulling the auxiliary wires out where I could work with them. The assembly guys at the plant taped them well. That said, wiring was the easiest part. The video doesn’t show him heating the crimp connectors once the wires are connected, so don’t forget that part to make it watertight!

If you follow the directions in the video, take it slow, you’ll be fine.
 
I have a brand new, still sealed in box available if anyone is interested.
 
Is your RHO one of a kind?  Let's find out. What did you do to your RHO Today? First 3 days with my Forged Blue RHO.  Limited to RHO. Eibach Pro-Lift Kit Installed Red RHO at MN state fair Sirius XM - Platinum 5 year plan
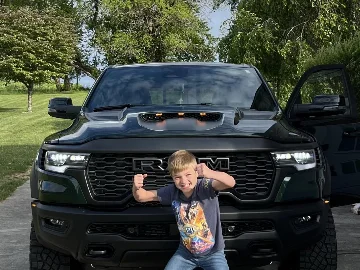
Is your RHO one of a kind?  Let's find out. What did you do to your RHO Today? First 3 days with my Forged Blue RHO.  Limited to RHO. Eibach Pro-Lift Kit Installed
Back
Top